前言
上学期数据仓库捣鼓了一下python的flask后端,对nodejs的后端也产生了兴趣,打算研究一下nodejs的后端。
前置条件
默认情况下,安装好node和yarn即可,我们使用yarn进行包管理,若没有安装yarn,可以使用npm安装:
查看yarn版本:
初始化node
使用yarn初始化:
1
2
3
| $ mkdir your-project-name
$ cd your-project-name
$ yarn init -y
|
然后你的目录里就多了一个package.json文件,它在描述了该项目所需要的包。
初始化git
创建.gitignore文件,添加node_modules和dist等不需要版本管理的文件or目录,然后运行命令:
安装一些包
- 安装express,这是一个nodejs下的后端框架
1
| $ yarn add -D typescript @types/node @types/express
|
- 需要typescript的配置文件,使用tsc命令,如果没有tsc命令则需先用npm安装:
1
2
| $ npm install -g tsc
$ tsc --init
|
tsc用于编译typescript到javascript,但此时init出来的tsconfig.json并非我们需要的配置文件。因此删除,再使用npx重新生成,同理若没有npx则需先用npm安装:
1
2
| $ npm install -g npx
$ npx tsconfig.json
|
这是生成的tsconfig.json文件
1
2
3
4
5
6
7
8
9
10
11
12
13
14
15
16
17
18
19
20
21
22
23
24
25
26
27
28
| {
"compilerOptions": {
"target": "es2017",
"module": "commonjs",
"lib": ["dom", "es6", "es2017", "esnext.asynciterable"],
"skipLibCheck": true,
"sourceMap": true,
"outDir": "./dist",
"moduleResolution": "node",
"removeComments": true,
"noImplicitAny": true,
"strictNullChecks": true,
"strictFunctionTypes": true,
"noImplicitThis": true,
"noUnusedLocals": true,
"noUnusedParameters": true,
"noImplicitReturns": true,
"noFallthroughCasesInSwitch": true,
"allowSyntheticDefaultImports": true,
"esModuleInterop": true,
"emitDecoratorMetadata": true,
"experimentalDecorators": true,
"resolveJsonModule": true,
"baseUrl": "."
},
"exclude": ["node_modules"],
"include": ["./src/**/*.ts"]
}
|
在上述的tsconfig.json中,include中的是./src/**/*.ts,outDir是./dist,因此在项目根目录中,新建一个src目录,再创建index.ts文件,并在其中添加内容:
1
| console.log("hello world");
|
保存后再命令行运行tsc,可以看到多了一个dist目录,里面有两个文件,分别是index.js和index.js.map,其中index.js便是从typescript转换而来的javascript代码。可以试着运行index.js。tsc命令会读取tsconfig.json的内容,再进行编译。
1
2
| $ node dist/index.js
hello world
|
将上述命令写到配置文件package.json中,新建一个scripts属性,如下所示:
1
2
3
4
5
6
7
8
9
10
11
12
13
14
15
16
17
18
19
20
21
22
23
| {
"name": "your-project-name",
"version": "1.0.0",
"main": "index.js",
"license": "MIT",
"dependencies": {
"express": "^4.18.2",
"neo4j-driver": "^5.4.0",
"nodemon": "^2.0.20"
},
"devDependencies": {
"@types/express": "^4.17.15",
"@types/node": "^18.11.18",
"ts-node-dev": "^2.0.0",
"typescript": "^4.9.4"
},
"scripts": {
"build": "tsc",
"start": "ts-node-dev --respawn src/index.ts",
"dev": "nodemon --exec ts-node src/index.ts"
}
}
|
可以看到build命令后映射的是tsc,,因此当运行yarn build时,就会在dist中生成对应的js文件。
同时这里使用了ts-node-dev包和nodemon包,它们都是用于监控项目文件的修改,检测到修改后自动重新运行,可以使用yarn安装:
1
2
| yarn add -D ts-node-dev
yarn add -D nodemon ts-node
|
而后就可以使用yarn start或yarn dev命令运行项目,两者装其一其实就行。
使用yarn upgrade-interactive命令。
路由配置
首先编辑程序入口index.ts,我们需要创建app,并将其跑到某个端口之上。
1
2
3
4
5
6
| import express ,{ Express }from 'express'
let app: Express = express();
app.listen(3000, () => {
console.log("server is running on port 3000");
});
|
为了进行api的调用,需要在listen之前设置路由。经典的后端框架分为controller、service等层,在此简单弄一个controller用以测试。
在项目根目录新建controllers目录,再新建一个test.ts文件,分别定义get测试和post测试,内容如下:
1
2
3
4
5
6
7
8
9
10
11
12
13
14
15
16
17
18
19
20
21
22
23
24
25
26
27
28
29
30
31
32
33
34
35
36
37
38
39
40
41
42
43
44
45
46
47
48
49
|
import { Request, Response } from "express";
export const testget = async (req: Request, res: Response) => {
try {
console.log(req.query);
const username = req.query.username as string;
const password = req.query.password as string;
res.send({
code: 200,
data: {
username,
password,
},
message: "success",
});
} catch (error) {
res.send({
code: 500,
data: null,
message: error.message,
});
}
};
export const testpost = async (req: Request, res: Response) => {
try {
console.log(req.body);
const username = req.body.username as string;
const password = req.body.password as string;
res.send({
code: 200,
data: {
username,
password,
},
message: "success",
});
} catch (error) {
res.send({
code: 500,
data: null,
message: error.message,
});
}
}
|
而后在index.ts中添加路由,
1
2
3
4
5
| import * as testController from "./controllers/test";
app.get("/test/get", testController.testget);
app.post("/test/post", testController.testpost);
|
为了能够处理json编码,并且解决跨域问题,代码如下:
1
2
3
4
5
6
7
8
9
10
11
12
13
14
15
16
17
18
19
20
21
22
23
24
25
26
| import express, { Express } from 'express'
import * as bodyParser from "body-parser";
import * as testController from "./controllers/test";
let app: Express = express();
app.use(bodyParser.json());
app.use(
bodyParser.urlencoded({
extended: true,
})
);
app.all("*", (_req, res, next) => {
res.header("Access-Control-Allow-Origin", "*");
res.header("Access-Control-Allow-Headers", "content-type");
res.header("Access-Control-Allow-Methods", "PUT,POST,GET,DELETE,OPTIONS");
res.header("X-Powered-By", " 3.2.1");
res.header("Content-Type", "application/json;charset=utf-8");
next();
});
app.get("/test/get", testController.testget);
app.post("/test/post", testController.testpost);
app.listen(3000, () => {
console.log("server is running on port 3000");
});
|
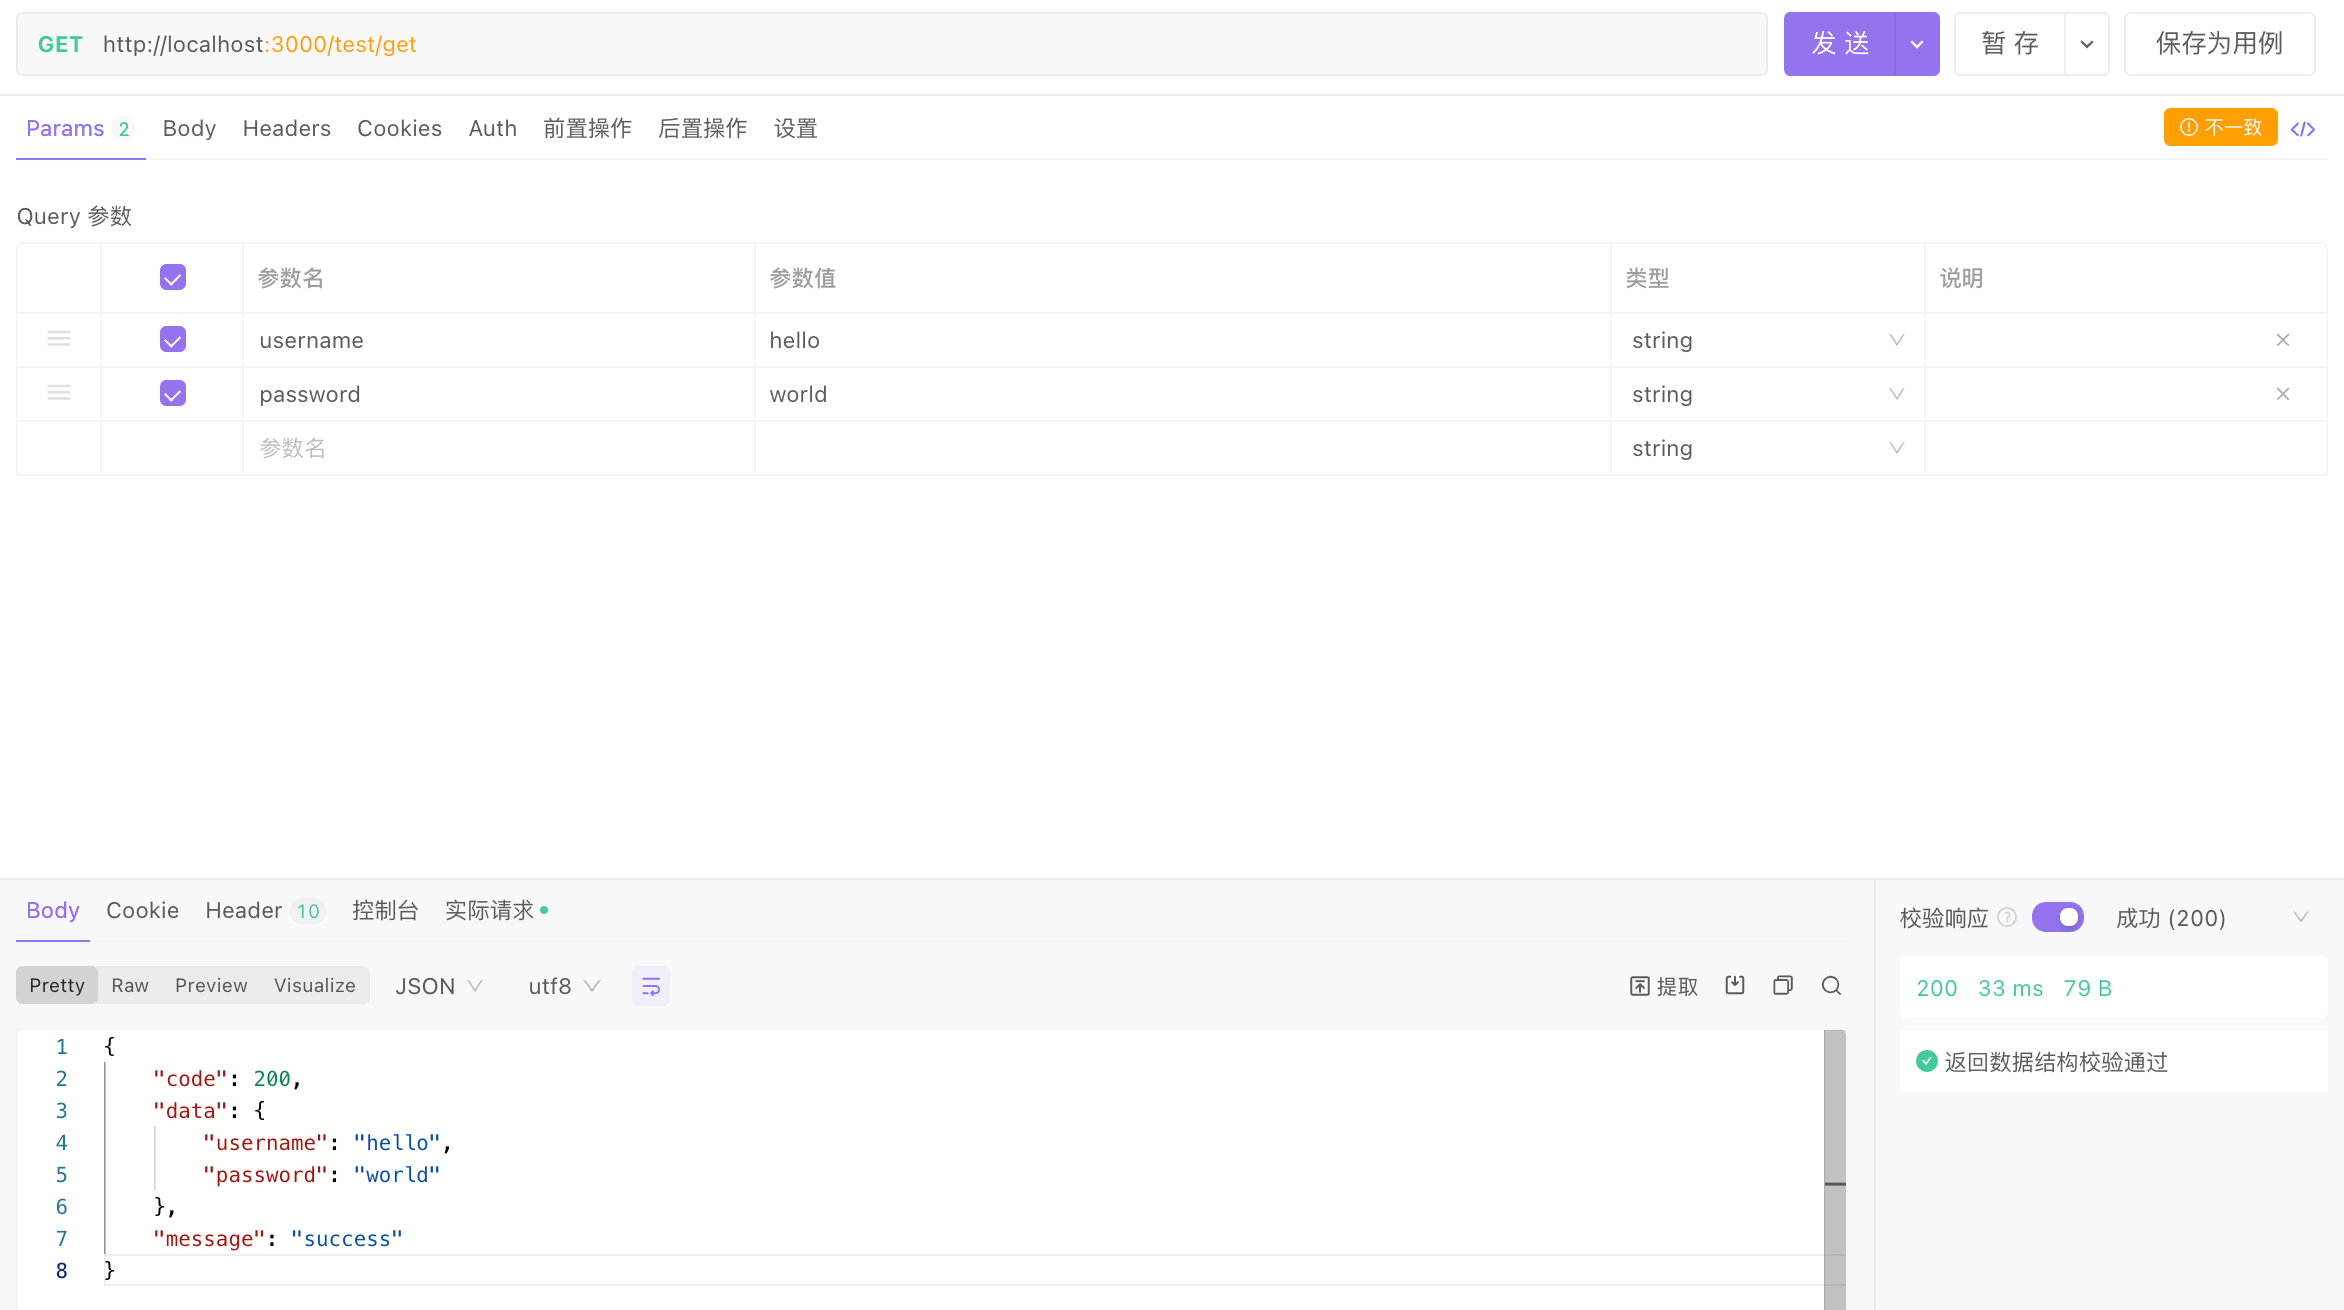
可以用postman或apifox等工具进行访问。
1
2
3
4
5
6
7
8
9
10
11
| .
├── dist
│ ├── index.js
│ └── index.js.map
├── package.json
├── src
│ ├── controllers
│ │ └── test.ts
│ └── index.ts
├── tsconfig.json
└── yarn.lock
|
访问mysql
留待填坑、、、
访问neo4j